Listen for engagement problems
Rhythmic clicking can indicate a damaged tooth, tight joint, pitch mismatch or misalignment. Identify whether the noise repeats once per chain revolution or at every sprocket engagement.
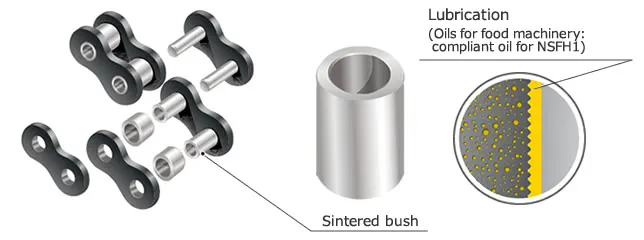
Improve hollow pin chain service by checking sprocket wear, shaft alignment, guide contact, lubrication, elongation and attachment condition.
Inspect tooth profile before installing new chain. Hooked, pointed or unevenly worn teeth can prevent smooth seating and accelerate wear. Confirm pitch, tooth count and chain width if the sprocket will be reused.
Parallel shafts, aligned sprockets and correctly positioned rails help the chain articulate without side load. Look for polished side-plate marks, uneven roller wear or a carrier that runs out of square; these can indicate guide or strand alignment problems.
Do not remove all chain slack simply to make the conveyor look tight. Follow the machine take-up arrangement and avoid excessive tension that increases joint, bearing and shaft load. Recheck tension after the initial run-in period.
Where lubrication is allowed, the lubricant needs to reach the articulating joint rather than only coating the outside plates. Choose viscosity and application method for speed, temperature, contamination and process restrictions. If the machine must run dry, include that requirement when selecting the chain.
Measure chain length over a fixed number of pitches and keep a record. Also inspect hollow bores, rods, retainers, rollers or bushes, guide contact and sprocket teeth. A trend is more useful than waiting for a sudden failure.
Run the conveyor at low speed after chain, sprocket or guide work. Watch attachment movement around the sprockets and through transfer points before returning to normal production speed and load.
Include the model or dimensions, attachment drawing, sprocket information, speed, load, environment and quantity for a quotation.
Before installation, inspect sprockets, shafts, bearings and guides. Hooked teeth, unequal sprocket positions or a worn guide rail can force a new chain to run poorly from the first cycle. On a two-strand conveyor, confirm that both drive sprockets are aligned on the shaft and that the driven shafts remain parallel.
Excessive tension increases bearing and chain load, while too much slack can allow poor sprocket engagement or carrier instability. Follow the machine builder’s adjustment method where it exists. For an unknown retrofit, establish enough controlled slack for smooth articulation and recheck after the first running period as components settle.
Rhythmic clicking can indicate a damaged tooth, tight joint, pitch mismatch or misalignment. Identify whether the noise repeats once per chain revolution or at every sprocket engagement.
Polished plate edges or one-sided roller wear often point to lateral forcing. Correct the conveyor path instead of only increasing lubrication.
Chain wear shows as increased pitch over a multi-pitch length. Use the same measurement method over time to track change rather than relying on a single joint.
Loose cross rods can fret the hollow bore and create side load. Check fasteners and carrier squareness during routine inspection.
The lubrication method depends on chain design, speed, environment and machine restrictions. Apply the specified lubricant to the joint area rather than coating external surfaces without purpose. In dusty service, excess surface lubricant can collect contamination. In food equipment, use the lubricant and application practice approved for the machine zone.
Turn the conveyor manually if possible, then run it at low speed without product. Watch the chain through the drive and return sprockets, check carrier clearance and listen for periodic noise. Recheck tension, attachment hardware and sprocket set screws after the first operating period. For parallel strands, confirm that the carrier remains square from one end of the conveyor to the other.
If wear appears mainly on one side of the chain, check alignment and guide position. If wear is concentrated at the articulating joint across the full chain, review lubrication, contamination and duty. If only attachment positions are damaged, inspect rod fit and carrier loading. Treating every symptom as “normal chain wear” can lead to repeated replacements without correcting the conveyor condition that caused it.
Keep removed parts long enough to compare them with the new chain and sprocket. The difference in tooth profile, guide contact and joint movement can reveal maintenance issues that are hard to see while the machine is assembled.
When adjusting a conveyor after maintenance, change one variable at a time where possible. Correct shaft alignment and sprocket position before changing tension, then confirm guide contact before altering lubrication. This makes the root cause easier to identify and reduces the chance that excessive tension temporarily hides a tracking problem.
If multiple identical machines use the same chain, compare wear records between them. A much shorter service interval on one machine can indicate a local alignment, contamination or duty issue rather than a chain-selection problem.
After correcting a tracking problem, mark the sprocket and guide positions or record the adjustment dimensions. This gives the next maintenance technician a known baseline and reduces repeated trial-and-error adjustments.
Confirm that guards and covers are reinstalled without touching the chain or attachments, then document the final adjustment before returning the machine to production.
Request a Quote
Send the chain model or dimensions, attachment drawing, sprocket information, operating speed and load, environment and quantity. We will help you identify a suitable hollow pin chain configuration.